Tuesday, December 6, 2011
pot holders
I have been wanting to make fun pot holders for a relative (that desperately needs new pot holders) but most of the tutorials involved some kind of binding...and I still don't know if I have recovered from all the binding in my first quilt. So then I stumbled upon this great photo here: cloud 9 fabrics, which led to the tutorial here: craftzine. Simple to make, a good way to use scrap pieces of fabric, and an easy way to brighten up a kitchen!
Monday, December 5, 2011
clutch #1
A few weeks ago, my mom, sister, and I went to City Craft in Dallas, and I found this great Echo fabric. Actually, I found tons of great fabrics, but I tried to show restraint - we were supposed to be Christmas shopping for the rest of the family. I am going to be creating several versions of a small clutch that I can use to carry my iphone, keys, an id and credit card, and a lip balm. I was inspired by the clutch on the blog cakies, but had a little trouble following the instructions so I designed my own pattern.
Tuesday, November 29, 2011
Felt Stockings
These felt stockings are probably my favorite Christmas decoration in our house. I made a pattern, and then cut out the stockings using pinking shears (two identical stockings of each color). I embellished the top stocking (with my machine and by hand) before sewing the two layers together. I added a small piece of felt for my "hook" and then stuffed with a little tissue paper to plump the stocking before hanging.
Wednesday, November 9, 2011
crayon rolls
Crayon rolls are nothing new, but there is no reason to know about them unless you have a squirmy toddler that you are constantly trying to entertain/keep busy. They are really easy to make, and perfect to keep in your purse, diaper bag, carry-on when traveling, etc.
Saturday, November 5, 2011
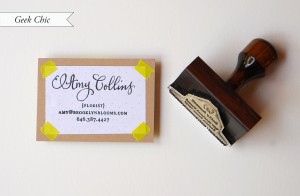
my business cards
...and here they are, my stamped business cards. I had a stamp made at Abbey Printing downtown, and I think they did a great job with the stamp. The turn-around was really quick, and it only cost me twelve dollars. I first printed on card stock that I cut business card size, but I wanted something a little more unique, plus the cutting was taking a looong time, and I am impatient. So I bought a package of manila labels, stamped, and sewed a strip of scrap fabric onto the end of each label.
Saturday, October 29, 2011
business cards in progress...

source: oh so beautiful paper

source: craftaholics anonymous

source: bizuza digital art

source: oh happy day
Friday, October 28, 2011
Wednesday, October 19, 2011
Makeup Bag

 This was one of my favorite projects to date. The tutorial I found here: https://docs.google.com/View?id=dfhzndwh_3rszbxhn&pli=1 was really easy to follow, even though it was my first time to sew a zipper. I also looked at another tutorial on zippers here: http://sewmamasew.com/blog2/2007/05/installing-a-zipper-tutorial-by-michelle/ just to get a little more info (I had to shorten my zipper). All the fabric pieces that you need are small, so it easy to use scraps and it only took me a few hours to make.
Rating: Easy (beginner). Time: 2-3 hours.
Monday, October 17, 2011
My first quilt

 I completed my first quilt this past weekend! I have loved quilts since college, particularly modern quilts like those created by Denyse Schmidt. This quilt is for one of my dear friends Beth, who is having her first baby this December. I selected fabrics from the same line that she is using for her baby bedding, and I used the pattern from here: http://sewmamasew.com/blog2/2009/10/elizabeths-fabric-focus-charm-squares-baby-quilt/ to make my quilt. I also used the hand binding tutorial from here: http://splityarn.com/2010/05/12/how-to-easily-hand-sew-a-quilt-binding.html. The binding was definitely the most challenging part of the quilt.
Sunday, August 28, 2011
Play Kitchen

We might not have saved much money building it ourselves, but are thrilled with the final result, and now Byron is looking around the house for more projects that involve a saw and hammer.
Friday, August 26, 2011
Napkins

Monday, August 8, 2011
Wall Stenciling Finished!
Thursday, August 4, 2011
Burp Cloths
Thursday, July 14, 2011
Wall Stenciling

Here is a photo after day 1. It is time consuming, but not hard...
Monday, July 11, 2011
Felt Pillows


Key Rack

Chalkboard door

Subscribe to:
Posts (Atom)


